


The classical guitar is one of the most mellow and beautiful instruments in the world. Yes, that is a biased opinion. Starting from the wood used to the shape of the nails and the strings, it is a rich musical instrument. Let us look at a little history of the guitar strings and how they are tied to the instrument. See what I did there? Okay, let’s go:

Nylon strings are created specifically for the classical guitar. It is important to note that steel strings are not recommended for a classical guitar. The reason is that the neck is not created to withstand that much tension. The steel string acoustic and electric guitars are designed to handle the tension from steel strings. They have a truss rod that gives them the support needed. If you put steel strings on a classical guitar, whether for an acoustic or electric, you will most likely ruin the neck.
Important: Never put steel strings on a classical guitar. It will ruin the neck of the guitar.
– Every Classical Guitar Teacher Ever
String Construction
That being said, classical guitar necks have never been subject to much tension. Prior to World War II classical guitar strings were made of animal intestine and silk wound with animal intestine.1 Due to a lack of supply in 1948 Albert Augustine Ltd. began developing and selling nylon strings. Since then, string manufacturers have developed even more, er… interesting types of strings. 1 They also encourage you to try them all.
Since the development of nylon guitar strings by Albert Augustine Ltd. in 1948, the three treble strings are a single nylon filament (a fine or very thin thread or fiber), while the three bass strings are made of a core of fine nylon threadlike filaments wound with silver-plated bronze or copper wire.
Changing Strings
So, how does all this tie into the guitar? I’m glad you asked. When first learning to change strings, I followed the steps from the Christopher Parkening Guitar Method Vol. 1, page 102. However, since then I have modified the approach slightly.
First, to remove the strings, it is recommended that you have a good string winder. It is a good idea to invest in a few proper tools for changing strings. It is highly recommended to purchase an Alice A009-C Multifunctional String Winder or a similar winder with a deeper weld:
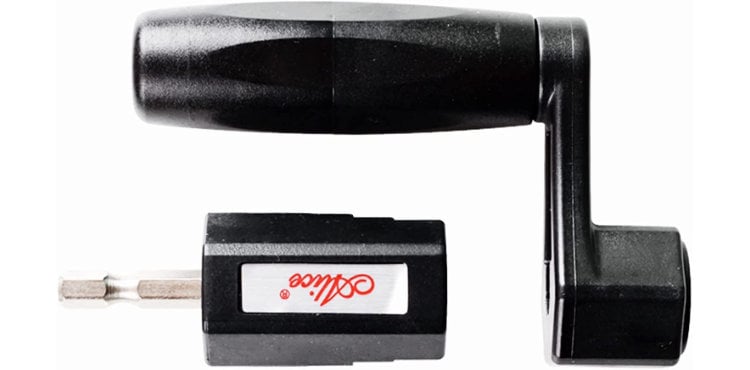
At the time of writing this article, you can find it by clicking here.
Find a stable area for the guitar to sit or lay. Many times, I have the guitar sitting on the guitar stand. That way it is easier to access the machine heads. However, after removing the strings, you might want to lay the guitar down on the back with the bass strings facing you.2 A headstand is also recommended to keep the guitar stable.
Removing the Strings
There is a bit of debate about whether to remove all the strings at once. Some say that relieving all the tension could affect the neck in adverse ways. However, I have spoken with others, luthiers, and guitarists, who say there is little to no effect. After speaking with them, I am of the mindset that it is fine to remove the strings all at once. I don’t recommend cutting the strings, but gently relieving the tension by unwinding the strings and then removing them.
When attaching new strings, the thicker strings may have a thinner leader on them. I have seen videos where people use the thinner leader to thread the tie block (under the bridge). This is not my custom. I find it easier to use the thinner leader to thread the string roller on the headstock. Either way, I think that it is important to thread each string the same way. Either all the leaders through the tie block or all of them through the rollers.
Attaching the New Strings
With the guitar on its back with the bass strings facing you, start with the 6th string (or lowest string). Thread it through the 6th string hole on the tie block. Pull the string through until there are about two inches on the other side. Wrap this part of the string around the part of the string entering into the tie block.
Then through the loop you created. Then over the string itself and through the loop once more. The low E, A, D, and G strings should wrap themselves twice.
The high E and B strings should wrap themselves three times.
Make sure to leave enough leader on the string to double-lock it under the adjacent string. We will come back to this step in a minute.
Tying the String at the Headstock
Tying the string to the machine head roller on the headstock is very simple. Stretch the string out towards the headstock. Place it over the nut in its proper slot. Thread the string through the hole in the roller. Pull the string around (back to the top) and tie an overhand knot. An overhand knot is a knot you use to tie your shoelaces… without the bow.
After that, pull the string taut (pulled or drawn tight; not slack) and wind the string via the machine head until it is snug. Pulling the string taut keeps a little tension on it and allows it to wind correctly. Do not over-tighten the string yet. We just want the slack out of it.
Locking and Double-Locking the String
Once the string is tightened and has enough tension, make sure that the string is “locked” behind the tie block. Leave enough leader of the string to “double lock” it. Double locking the string means locking the “tail” or “leader” under the adjacent string:
- The 6th (Low E string) should lock under the 5th (A string).
- The 5th (A string) should lock under the 4th (D string).
- The 4th (D string) should lock under the 3rd (G string).
- The 3rd (G string) should lock under the 2nd (B string).
- The 2nd (B string) should lock under the 1st (High E string). Do not tighten this string yet.
- The 1st (High E string) should lock under the 2nd (B string). The first string must be locked under the second string as there are no other strings beyond that.
It is important that you leave enough slackness in the 2nd string to double-lock the 1st string. After that, snug all the strings down and tighten the strings.
Tuning a Classical Guitar
I have to refrain from making the tune-a-fish joke here. Moving on. One of the things that you might have noticed is that nylon strings tend to stretch. New strings really stretch. I find it helpful to tighten the strings until they stop stretching, being careful not to overstretch them. For example, the low E string might only tune to D#. Instead of trying to force the string to E, let it sit for a couple of hours and settle. Once the string has settled, then try to tune it the rest of the way.
Tune the strings in this manner every three to four hours if possible. I will tune up when I get up, around lunchtime, and before I go to bed. The strings should tune-up to the proper tuning in three to four days. And for the most part, should hold their tuning. Of, course you’ll have to tune up before playing.
String Changing Bag
Another highly recommended idea is having a string-changing bag to keep all your accessories in. Keep the string winder and wire cutter in a place where you can find them easily (if you don’t put them in your guitar case or bag). It is always helpful to be able to find your tools when you need them.
Extra Strings
One extra thought before you go. You might want to have an extra pair of strings in your bag or case as well. Just in case a string breaks or separates as strings want to do, it is pretty handy to have replacement strings on, um… hand. Keep rotating your strings out (i.e., use the extra set when replacing your strings and replace the extra set with a new set). Also, one more thought. I like to keep the box of the last set of strings to remind me of which strings I purchased. Especially if I liked them.
Bonus Thought
I usually get my strings from Strings by Mail. They have a great selection and other accessories as well.
If you like this blog post, you should sign up for the monthly newsletter and consider sharing it.
Comments ()